News

News
Homemade/DIY Vanilla Christmas Gift Ideas
by Vanilla Planet on Nov 25 2025
All of these gifts use real vanilla beans, especially Papua New Guinea Planifolia (for smoky depth) or Tahitensis (for floral sweetness). You can mix and match items into a themed gift basket! Hand write a special message and you have special Christmas gifts to share.
Home made Vanilla Extract (Deluxe Triple Fold) - Classic and always loved.
Ingredients:
3 oz vanilla beans per bottle (each vanilla bean has a unique flavor – so many to try!)
8 oz Vodka, bourbon, or rum (your choice)..I prefer Vodka for a pure vanilla flavor
Glass gift bottle/jar
Instructions:
You can split beans or keep them whole and place in the bottle.
Fill with alcohol, seal tightly and gently tip the bottle weekly to mix.
Ready in 6-12 months depending on your preference. Keep the pods to use for syrup, sugar or any of your other favorite recipes!
Vanilla Bean Sugar - Perfect for tea, specialty coffee, baking, or topping toast.
1-2 vanilla beans or 1-2 tsp vanilla powder (depending on your preference)
1 cup granulated white or raw sugar
Mason jar or glass jar with lid
Instructions:
Scrape seeds into sugar and stir; for a stronger flavor and finer sugar, blend in a blender, spice blender or food processer.
Bury pods in the sugar and seal jar.
You can use immediately; for a more robust flavor, let infuse for 1–2 weeks. Shake occasionally to avoid clumping.
Vanilla Coconut Sugar Scrub - Simple spa treat for skin-loving friends.
Ingredients:
1/4 cup sugar (granulated for courser scrub or brown for a finer scrub)
1/4 cup coconut oil (melted)
Seeds from 1 vanilla bean or 1 tsp vanilla powder
Glass gift jar with lid
Instructions:
Mix the vanilla and sugar together then pour in melted coconut oil. It will have a wet sandy texture and will become thicker as it cools. You can add 2-3 drops of vitamin E oil if you like. This scrub is great to use in the shower and creates soft, smooth skin.
Vanilla Bean Coffee Syrup - For coffee lovers or cocktail mixers.
Ingredients:
1 cup sugar
1 cup water
1 vanilla bean, split and scraped
Glass bottle with lid
Instructions:
Simmer sugar, water, and vanilla seeds + pod for 5–10 minutes.
Cool, bottle, and refrigerate.
Vanilla Bean Christmas Simmer Pot Kit - A cozy, aromatic experience alternative to candles to make your home smell amazing and bring on cozy Christmas feels.
Ingredients:
1–2 vanilla bean pods (used or fresh)
4-5 Black Pepper Corns
1 Tbsp Black Tea
1-2 Cinnamon sticks
5 Cloves
1 Whole nutmeg
2 star anise
5 whole cardamom pods
Craft bag or gift jar
Mix ingredients in a craft bag or jar with the following instructions - Simmer in a pot of water on the stove or in your crockpot for a wonderful cozy smell – add water every 30-45 minutes.
Vanilla Body Oil - Moisturizing and naturally fragrant.
Ingredients:
½ cup of Jojoba, baby or almond oil
1 vanilla bean (cut and scraped)
Small glass dropper bottle
Instructions:
Place scraped vanilla beans and cut pod into a glass jar; pour carrier oil overtop and seal in the jar. Let steep for 1–2 weeks in a cool place. Shake gently daily. Once it has reached your desired scent intensity, strain through cheesecloth and bottle.
Bonus Idea: Build a Gift Basket
Mix 3–5 of the ideas above into a themed basket:
Tie with twine or ribbon
Add a handwritten vanilla recipe card
Include package(s) of your favorite vanilla beans www.vanillaplanet.com or a Vanilla Planet Gift Card , your favorite Christmas recipes, add a Christmas decoration, a candle, or dried flowers for a special gift for family or friends to enjoy a personal gift with love

News
Delicious Recipes Using Vanilla for Thanksgiving This Year
by Vanilla Planet on Oct 09 2025
Vanilla Bean Apple Crisp
The fresh vanilla makes for a warm, comforting experience – like a hug from Grandma 😊
4 cups of sliced apples
1tsp vanilla powder or extract or seeds of one bean
½ cup rolled oats
¼ cup flour/almond flour
¼ cup brown sugar
1 tsp cinnamon
3 tbsp butter or coconut oil melted
Heat oven to 350 degrees. Mix apples and vanilla into a 8x8 or 9x9 baking dish; mix flour, sugar, and oil or butter together to a crumble texture – pat over apple mixture and bake for 30-35 minutes
Sweet Potato Casserole with Vanilla
Crowd pleaser – fresh vanilla takes it to a whole new level.
2 cups cooked/mashed sweet potato
¼ cup butter
1 vanilla bean scraped or 1 tsp vanilla powder
1 egg beaten
½ cup evaporated milk
1 tsp salt
¼ cup milk
Topping – add 3/4 cup brown sugar, ½ cup flour, pinch of salt, 6 tablespoons of butter and blend well then mix in 1 ¼ c crushed pecans
Heat oven to 400 degrees. Mix sweet potato, butter, sugar, cinnamon, salt and vanilla into a large bowl; in a separate bowl mix egg, evaporated and regular milk together – then blend to a smooth consistency. Pour mixture into a 9x13 baking dish. Sprinkle topping over top and bake for 25- 30 minutes. Another warm and comforting dish to enjoy together.
Vanilla Chai Tea
Delicious comfort to share with a good friend 😊
2 sticks cinnamon
1 vanilla bean pod and/or 1 tsp vanilla powder (depending on your preference)
2-4 cardamom pods
1 cup creamer of your choice
1 bag black tea of your preference
½ tsp nutmeg
Add water, tea bag, and spices to small saucepan on medium heat; bring to a boil for 10-20 minutes; add creamer and boil for another 5 minutes; remove from heat and strain spices and remove tea bag; top with a sprinkle of vanilla sugar if you want an extra hint of vanilla - pour into a mug and enjoy!
Vanilla Bean Glazed Carrots
Yummy asset to a favorite fall vegetable – kids will love it!
½ pound peeled, cut carrots
Olive oil to drizzle and kosher salt
6 tablespoons melted butter
1 tablespoon honey
1 vanilla bean scraped
Optional: toast 1 cup crushed pecans
Roast carrots with olive oil and kosher salt until done/firm; mix butter, honey, vanilla bean caviar then pour over cooked carrots and add toasted pecans on top of carrots before serving if desired. Enjoy!
Vanilla Whipped Cream
Dreamy whipped cream and a wonderful addition to any warm drink/dessert! 😊
1 vanilla bean scraped or 1 ½ tsp vanilla powder
1 cup whipping cream
3 tbsp icing sugar
Pour cold whipping cream into a chilled metal bowl and add vanilla powder/caviar and whip with electric hand mixer to preferred texture.
Vanilla & Spice Turkey Brine
Creates a unique and savoury flavor.
1-2 split vanilla beans
1 cup of apple cider of choice
½ teaspoon salt
Pinch of peppercorns
1 sprig of rosemary or 1 tsp rosemary and thyme
Mix into a bowl and use to baste turkey while cooking
Fresh Cranberry Sauce with Vanilla
Amazing accompaniment with Turkey!
½ cup water
½ cup fresh squeezed/concentrated orange juice
¾ cup sugar
12 ounces fresh or frozen cranberries
2 strips orange zest
1/8 tsp kosher salt
1 split vanilla bean caviar or 1 ½ tsp vanilla powder
Mix ingredients into a saucepan and bring to a slow boil. Cool and serve.
Vanilla Mulled Cider
A warm, comforting blend of flavors to enjoy with friends 😊
1 container of apple cider
1 split vanilla bean caviar or 1 ½ tsp vanilla powder
1 stick of cinnamon
½ tablespoon cloves
½ orange sliced
Mix ingredients into a crockpot and simmer on low; strain prior to serving. Pour into a mug and enjoy!

News
Vanilla Facts, Flavor and Usage Profiles
by Vanilla Planet on Oct 09 2025
Vanilla is one of the most known and versatile flavors in the world, but there is so much more to vanilla than is commonly known! The location of where the vanilla is grown and the process used to cure it creates unique flavors, aromas, and specialized uses. Below is a tour of our Vanilla Planet product line:
Madagascar vanilla is a universal crowd pleaser and one of the most commonly used/known vanilla beans. It is a rich, creamy, sweet vanilla with deep caramel and bourbon notes commonly used for making extract, in baking cookies, cakes, custards, and ice cream/whipped cream.
Tahitian vanilla provides a unique, exotic floral, fruity, cherry like flavor. It is perfect for getting your dish noticed and stand out from the crowd! It is commonly used for delicate desserts such as Panna Cotta, crème brule, fruit tarts as well as in cocktails and syrups. It offers a nice twist in any DIY perfume and body care products.
Papua New Guinea (PNG) vanilla is grown in the rich volcanic soils of PNG providing a bold, earthy flavor with hints of cocoa and sometimes licorice. It is great for use in savory dishes such as rubs, sauces, glazes (especially on seafood/pork), in exotic desserts such as chocolate mousse, puddings, and sauces.
Sumatra vanilla provides a robust profile adding warmth to sweet and savory recipes. It has a woody, spicy, warm, flavor with balsamic undertones. This vanilla creates next level flavor to spice infused recipes such as Chai, gingerbread, rubs and is great for use in syrups/bitters for cocktails (e.g., Old Fashions, Chai tea latte, meat rubs) as well as honeys or jams.
Ugandan vanilla is grown in Uganda’s tropical climate producing beans that are oily and fragrant with a high vanillin content that provides a bold, rich, creamy profile with notes of milk chocolate best used for chocolate-based recipes, ganache, creamy drinks, lattes, vanilla infused oils or butter for baking.
Mexican vanilla was the originator of all vanillas. It offers a nostalgic, spicy, sweet profile that is known for it’s smooth, woody, slightly clove like spice flavor. It is the perfect profile pairing for rich cozy desserts and drinks (e.g., home-made hot chocolate).
Quick reference/recommendations for vanilla use:
Flavor profile
Vanilla Type
Best use
Creamy, Sweet, Classic
Madagascar
Ice cream, baking, everyday cooking
Floral, fruity, aromatic
Tahitian
Delicate desserts, perfumes, syrups
Smoky, earthy, bold
PNG
Savoury dishes, chocolate, gourmet blends
Rich, chocolatey, creamy
Ugandan
Ganache, lattes, baking butters
Spicy, woody, balsamic
Sumatra
Spice rubs, Chai, jams, syrups
Smooth, spicy, warm
Mexican
Warm drinks, cookies, spicy desserts
The amazing versatility of vanilla brings its own profile and magic to your table and recipes. Whether you are a home baker, chef, or lover of unique flavors experimenting with a variety of vanillas can bring your recipes to next level and open so many different profiles!
Consideration: Experiment by pairing different vanillas with seasonal ingredients or explore a “vanilla flight” by using a different origin in the same recipe to see how it transforms the final dish!
Vanilla Uses:
Vanilla Pods:
What they are: The whole, cured seed pods of the vanilla orchid, containing thousands of tiny, aromatic seeds.
How to use: Hold the bean tip and cut with a sharp knife along the mid-lateral section of the bean and scrape the seeds for use into recipes such as custards, ice cream, whipped cream, milk, cream, and syrups. Use as 1:1 measurement in recipes like that for vanilla extract. Keep the pods for additional use to make powder, syrups, etc.!
Vanilla Powder:
What it is: Dried and ground whole vanilla beans. Pure, alcohol-free, and ideal for dry mixes. It is available for purchase on our Vanilla Planet website!
How to use: Dry leftover beans and grind in a spice grinder for use to add to baked goods, spice rubs, or pancake mixes, stir into coffee, smoothies, or hot chocolate use sprinkle over whipped cream or fresh fruit. It can be used as you would in most recipes calling for vanilla extract.
Vanilla Extract:
What it is: Beans steeped in alcohol to extract their flavor — the most common kitchen staple. See our website on Vanilla Planet for the recipe.
How to use: Common universal use in baking cookies, cakes, brownies, or frosting, oatmeal, smoothies, or glazes. Use in savory sauces or marinades for a subtle twist.
Vanilla Pods:
What they are: The outer bean shell, often left after seeds are scraped and can be reused. Also, once extract is made, the pods can be removed, dried and ground into powder or used to infuse oils or syrups.
How to use: Infuse in liquids for custards or syrups – see simple syrup recipe on our Vanilla Planet website! Make homemade vanilla extract or sugar. Use dried pods in bath salts, candles, or body scrubs.
Best for: Infusions, extracts, and zero-waste DIY projects.
Vanilla Powder vs. Extract
These forms create a unique profile and have distinctive characteristics to consider; however, both provide for a flavorful experience!
Overview
Vanilla Powder
Vanilla Extract
Form
Ground dried vanilla bean pods
Liquid solution made by soaking vanilla beans in alcohol and water
Flavor
Pure concentrated flavor
Rich aromatic, vanilla flavor with slight alcoholic undertones
Usage
Great for dry recipes or where no additional liquid is desired
Ideal for liquids, batters, beverages, extracts
Alcohol Content
Alcohol free
Contains roughly 35% or more
Shelf Life
Longer shelf life ~ 3 years+
About 2 years if unopened; less after opening
Measurement
1:1 (my preference) or can ½ measurement of extract
1 tsp extract = 1 bean caviar or ½ tsp powder
Color Impact
Adds tiny dark specs to recipes
Clear, amber, deep brown liquid depending on bean type/how long beans of soaked in alcohol solution
Have fun experimenting with new products and recipes to profile your favorite vanilla flavors and check out our Vanilla Planet website for products/recipe ideas! I love using vanilla powder and caviar and prefer them in most of my recipes!!

News
by Shane Walper on Sep 16 2025
Ingredients:
1 cup water
1 cup granulated sugar
1 tablespoon pure vanilla extract (or 1 vanilla bean)
Instructions:
Using vanilla extract:
In a small saucepan, combine water and sugar.
Heat over medium heat, stirring occasionally until sugar dissolves completely.
Remove from heat and stir in vanilla extract.
Let cool, then transfer to a clean bottle or jar.
Store in the refrigerator for up to 2 weeks.
Using a vanilla bean:
Split the vanilla bean lengthwise and scrape out the seeds.
Combine water, sugar, vanilla seeds, and the pod in a saucepan.
Heat and stir until sugar dissolves.
Simmer gently for 5 minutes to infuse.
Remove from heat, discard the pod, cool, and store as above.
Tips:
Use in cocktails, iced coffee, lemonades, or to sweeten teas.
Adjust sweetness by reducing or increasing sugar.
For a richer flavor, you can simmer the syrup a bit longer (do not boil hard).

News
4 Fall BBQ Recipes With Vanilla
by Shane Walper on Sep 16 2025
I bet when you think of BBQ, vanilla doesn't often come to mind first. But this secrete ingredient can change something from good to great! Here are a few of our favourite recipes and how to incorporate vanilla into them for the fall cookouts!
1. Vanilla-Glazed Grilled Pork Chops
Ingredients:
4 pork chops
2 tbsp olive oil
2 tbsp honey
1 vanilla bean, split and seeds scraped
2 cloves garlic, minced
Juice of 1 lime
Salt and pepper
Instructions:
In a bowl, mix olive oil, honey, vanilla seeds, garlic, lime juice, salt, and pepper.
Marinate pork chops for at least 1 hour.
Grill over medium heat 5-7 minutes per side or until cooked through, basting with marinade.
Serve with fresh herbs.
2. Vanilla and Chili Rubbed Chicken
Ingredients:
4 chicken breasts or thighs
1 vanilla bean, split and seeds scraped
1 tbsp chili powder
1 tsp smoked paprika
1 tsp garlic powder
Salt and pepper
2 tbsp olive oil
Instructions:
Mix vanilla seeds with chili powder, paprika, garlic powder, salt, and pepper.
Rub spice mix over chicken pieces.
Heat olive oil in skillet over medium-high heat.
Cook chicken 6-8 minutes per side or until fully cooked.
Serve with lime wedges.
3. Vanilla and Coffee Braised Beef
Ingredients:
2 lbs beef chuck roast
1 cup strong brewed coffee
1 vanilla bean, split and seeds scraped
1 onion, sliced
3 cloves garlic, smashed
1 cup beef broth
2 tbsp olive oil
Salt and pepper
Instructions:
Season beef with salt and pepper.
Brown beef in olive oil over medium-high heat. Remove beef.
In the same pot, sauté onion and garlic.
Add coffee, beef broth, vanilla seeds + pod.
Return beef to pot, cover, and simmer on low for 3 hours or until tender.
Remove vanilla pod before serving.
4. Vanilla and Soy Glazed Salmon
Ingredients:
4 salmon fillets
3 tbsp soy sauce
1 tbsp honey
1 vanilla bean, split and seeds scraped
1 tsp grated ginger
1 tbsp lime juice
Instructions:
Whisk soy sauce, honey, vanilla seeds, ginger, and lime juice.
Marinate salmon for 30 minutes.
Bake at 375°F (190°C) for 15-20 minutes or grill until cooked through.
Serve with steamed rice and vegetables.
Want a drink that pairs well? Try this!
Vanilla Old Fashioned Cocktail
Ingredients:
2 oz bourbon or whiskey
½ oz vanilla syrup (see above)
2 dashes Angostura bitters
Orange peel
Instructions:
Stir bourbon, vanilla syrup, and bitters with ice.
Strain into a glass with a large ice cube.
Express orange peel over drink and drop it in.

News
Summer Vanilla Recipes You Must Try!
by Shane Walper on Jul 29 2025
Vanilla Iced Latte
Cool coffee with a vanilla twist.
Ingredients:
1 cup cold brewed coffee or strong chilled espresso
1/2 cup milk or plant-based milk
1 tsp pure vanilla
Ice cubes
Optional: sweetener like honey or maple syrup
Instructions:
Mix coffee, milk, vanilla extract, and sweetener if using.
Pour over a glass filled with ice. Stir and enjoy!
Vanilla Berry Popsicles
Sweet, fruity, and vanilla-infused frozen treats.
Ingredients:
1 cup mixed fresh or frozen berries
1 cup plain yogurt or coconut yogurt
1 tsp pure vanilla
1-2 tbsp honey or maple syrup (optional)
Instructions:
Blend all ingredients until smooth.
Pour into popsicle molds and freeze for 4+ hours.
Vanilla Coconut Chia Pudding Parfait
Light, hydrating, and easy to prepare.
Ingredients:
3/4 cup coconut milk
1/4 cup chia seeds
1 tsp vanilla powder
Fresh fruit for topping (mango, kiwi, pineapple)
Instructions:
Mix coconut milk, chia seeds, and vanilla extract.
Refrigerate overnight to thicken.
Layer pudding with fresh fruit before serving.

News
The Different Types of Vanilla and How to Use Them
by Shane Walper on Jul 15 2025
Vanilla Beans • Powder • Extract • Pods
Vanilla is one of the most beloved and versatile flavors in the world, but not all vanilla is created equal. Whether you’re a home baker, chef, or DIY enthusiast, understanding the different forms of vanilla — and when to use them — can take your recipes and creations to the next level.
1. Vanilla Beans
What they are:
The whole, cured seed pods of the vanilla orchid, containing thousands of tiny, aromatic seeds.
How to use:
Split and scrape seeds into desserts like custards or ice cream.
Infuse beans into milk, cream, or syrups.
Use leftover pods for extract or vanilla sugar.
Best for:
Gourmet baking, creamy desserts, infusions.
👉 Shop Our Vanilla Beans
2. Vanilla Powder
What it is: Dried and ground whole vanilla beans. Pure, alcohol-free, and ideal for dry mixes.
How to use:
Add to baked goods, spice rubs, or pancake mixes.
Stir into coffee, smoothies, or hot chocolate.
Sprinkle over whipped cream or fresh fruit.
Best for: High-heat baking, dry recipes, and beverages.
Vanilla Powder
What it is: Dried and ground whole vanilla beans. Pure, alcohol-free, and ideal for dry mixes.
How to use:
Add to baked goods, spice rubs, or pancake mixes.
Stir into coffee, smoothies, or hot chocolate.
Sprinkle over whipped cream or fresh fruit.
Best for: High-heat baking, dry recipes, and beverages.
👉 Shop Our Vanilla Powder
3. Vanilla Extract
What it is: Beans steeped in alcohol to extract their flavor — the most common kitchen staple.
How to use:
Mix into cookies, cakes, brownies, or frosting.
Add a splash to oatmeal, smoothies, or glazes.
Use in savory sauces or marinades for a subtle twist.
Best for: Everyday baking and general-purpose use.
👉 Learn to Make Vanilla Extract at Home
4. Vanilla Pods
What they are: The outer bean shell, often left after seeds are scraped.
How to use:
Infuse in liquids for custards or syrups.
Make homemade vanilla extract or sugar.
Use dried pods in bath salts, candles, or body scrubs.
Best for: Infusions, extracts, and zero-waste DIY projects.
Which Vanilla Should You Use?
Recipe Type
Best Vanilla Form
Ice cream, custard
Whole beans or powder
Cookies & cakes
Extract or powder
Smoothies & lattes
Powder or extract
Infused syrups & sugar
Beans or pods
DIY crafts & gifts
Dried pods
Final Thoughts
Vanilla isn’t just a flavor — it’s an experience. Choosing the right form can bring out the best in your recipes and rituals. Explore different origins like Madagascar, Ecuador, Uganda, Sumatra, or Papua New Guinea to discover the depth and character of each variety.
From kitchen creations to calming DIY gifts, let vanilla inspire you — naturally.
Looking for premium vanilla?
Explore our selection of whole beans, powder, and extract in our shop — perfect for every kind of creation.
👉 Shop Vanilla Now

News
by Shane Walper on Jan 21 2025
Almost nothing is more decadent than a perfect fudge. This easy-peasy recipe only requires a few simple steps, and you’ll be ready to indulge in no time! We’ve perfected this recipe with our authentic vanilla to boost the flavour profile.
Ingredients
1-1/3 Cups Granulated Sugar
2 Tbsp Butter
1/2 Tsp Kosher Salt
2/3 Cup Evaporated Milk
1-1/2 Cups Semi-Sweet Chocolate Chips
5 oz Homemade Vanilla Bean Marshmallows (store bought works as well)
1/2 Cup Chopped Pecans
2 Tsp Madagascar Vanilla Extract
INSTRUCTIONS
Line and 8×8 Square pan with non-stick aluminum foil or parchment paper (If you use parchment paper lightly grease it with an oil spray)
Step 1
Line and 8×8 Square pan with non-stick aluminum foil or parchment paper (If you use parchment paper lightly grease it with an oil spray)
Step 2
In a heavy bottomed pot, combine sugar, butter, and milk. Bring to a boil over medium heat, stirring constantly, and then keep boiling for 5 minutes.
Step 3
Remove from heat and stir in remaining ingredients. Beat until the marshmallows are fully melted
Step 4
Pour into prepared pan and let it sit for an hour or two before cutting.
Products For This Recipe
Try our vanilla powder for this recipe!

News
by Shane Walper on Jan 21 2025
Vanilla ice cream is one of the most classic frozen desserts there is. We love indulging in this creamy treat by itself, or paired with any delicious accompaniment (apple pie, anyone?). When you use vanilla beans sourced from some of the most incredible locales, it truly makes a difference in the overall taste. Not to brag…but you’ll seriously notice a whole new depth of flavour when you use vanilla beans from Vanilla Planet!
We have perfected this ice ream recipe and is thrilled to share it with all of our amazing customers. What are you waiting for?! Delve into this ice cream recipe ASAP –you won’t regret it!
Time
PREP TIME – 35m
CHILLING TIME – 6h 30m
TOTAL TIME – 7h 5m
Equipment
Ice Cream Machine
Ingredients
4 Egg Yolks
3/4 Cup Sugar
2 Ecuador Tahitensis Vanilla Beans
2 Cups Milk
2 Cups Heavy Whipping Cream
INSTRUCTIONS
Line and 8×8 Square pan with non-stick aluminum foil or parchment paper (If you use parchment paper lightly grease it with an oil spray)
Step 1
In a medium bowl mix egg yolks and sugar until it forms light yellow ribbons when you lift your whisk.
Step 2
To a medium pot add milk and cream and vanilla caviar or if using the pods, slit scrape the caviar into the pot of milk and cream and add in the scraped out pods as well.
Step 3
Over medium-low heat bring to a simmer and simmer 7 min stirring frequently.
Step 4
Remove from heat and let it sit 20 min.
Step 5
Slowly whisk the still hot cream mixture into the egg yolk and sugar mixture. Pour it all back into the pot and heat over low while continually stirring slowly.
Step 6
Cook until the mixture coats the back of a wooden spoon. Be careful NOT to boil this mixture while heating it!
Step 7
Once it is thick, pour into a large clean bowl (use a 1 L glass Pyrex measuring cup) and refrigerate until the mixture is cold. This usually takes 6 hours or more.
Step 8
Pour into your Ice Cream Machine and churn to manufacturers’ specified times. Approximately 22 to 25 min.
News
by Shane Walper on Jan 21 2025
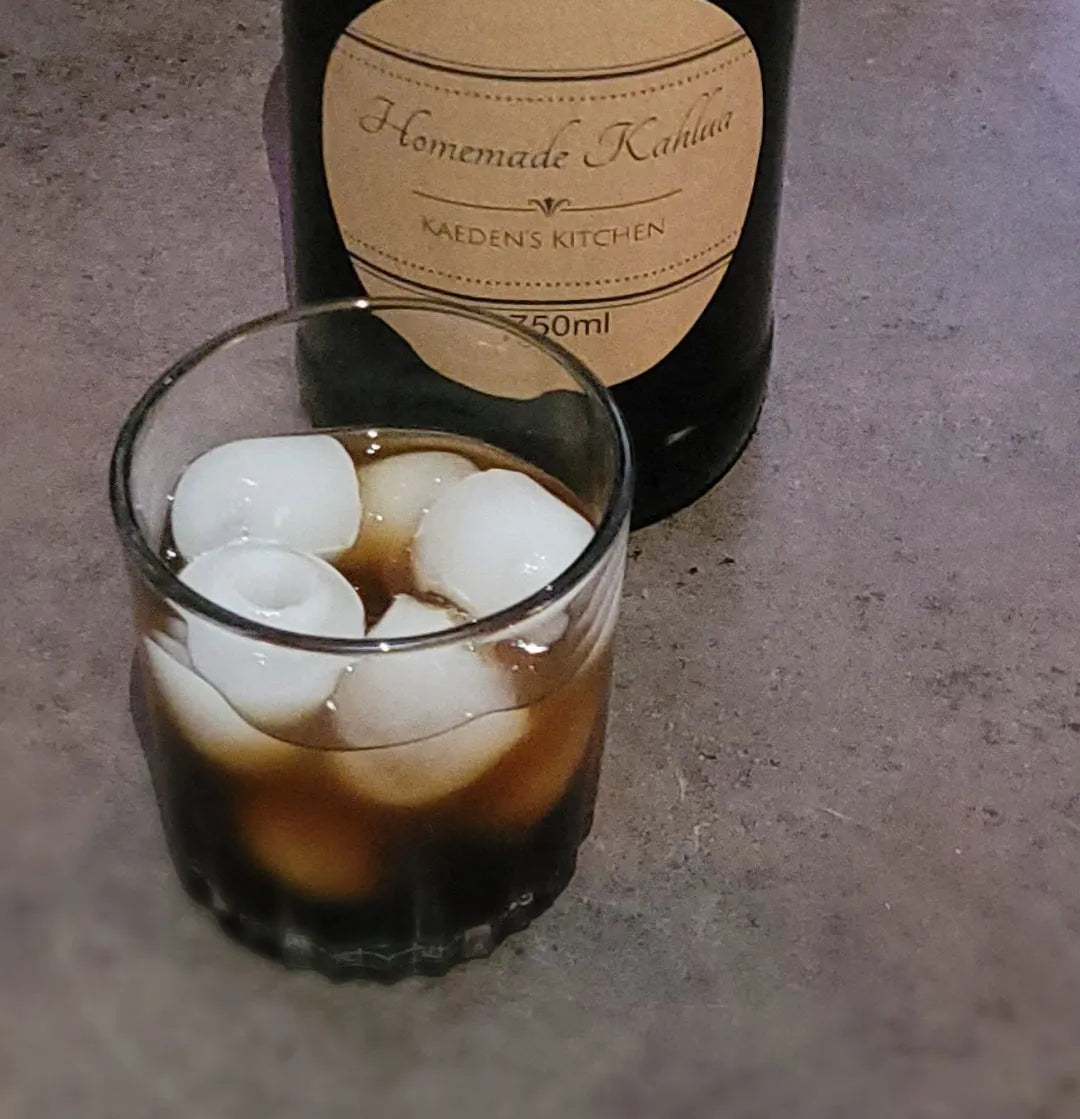
When you’re in need of a sweet liqueur, skip the store and make your own Kahlua! Using authentic vanilla to enhance the flavour (we recommend Uganda Vanilla), this recipe can be enjoyed on its own or mixed into other beverages and recipes.
Ingredients
3 Cups Water
3/4 Cup Granulated Sugar
1-1/2 Cups Brown Sugar (Packed)
3-1/2 Tbsp Instant Espresso (I use Italian)
2 Beans Uganda Vanilla Beans
1 Tbsp Uganda Vanilla Extract
1/2 Cup Vodka (I use Skyy)
1-3/4 Cups Spiced Rum (Appleton Estate)
INSTRUCTIONS
Line and 8×8 Square pan with non-stick aluminum foil or parchment paper (If you use parchment paper lightly grease it with an oil spray)
Step 1
Boil the water with the sugars and the vanilla bean on medium for approximately 25 minutes until the mixture reduces back to 3 cups.It will be slightly thickened.
Step 2
Add the coffee granules and simmer for 5 minutes until dissolved it will be sort-of of silky in texture.
Step 3
Remove from heat and allow to cool slightly for about 15 minutes; Meanwhile, combine the alcohols and add the vanilla extract to the alcohol mix.
Step 4
Add alcohol mixture to the sweetened coffee mixture and place in a glass container with the vanilla beans. This will then need to be aged 2 to 4 weeks. After the aging period, you can bottle and gift, or enjoy it yourself!
Notes
This makes approximately 1250ml
News
Banana Chocolate Zucchini Muffins
by Shane Walper on Jan 21 2025
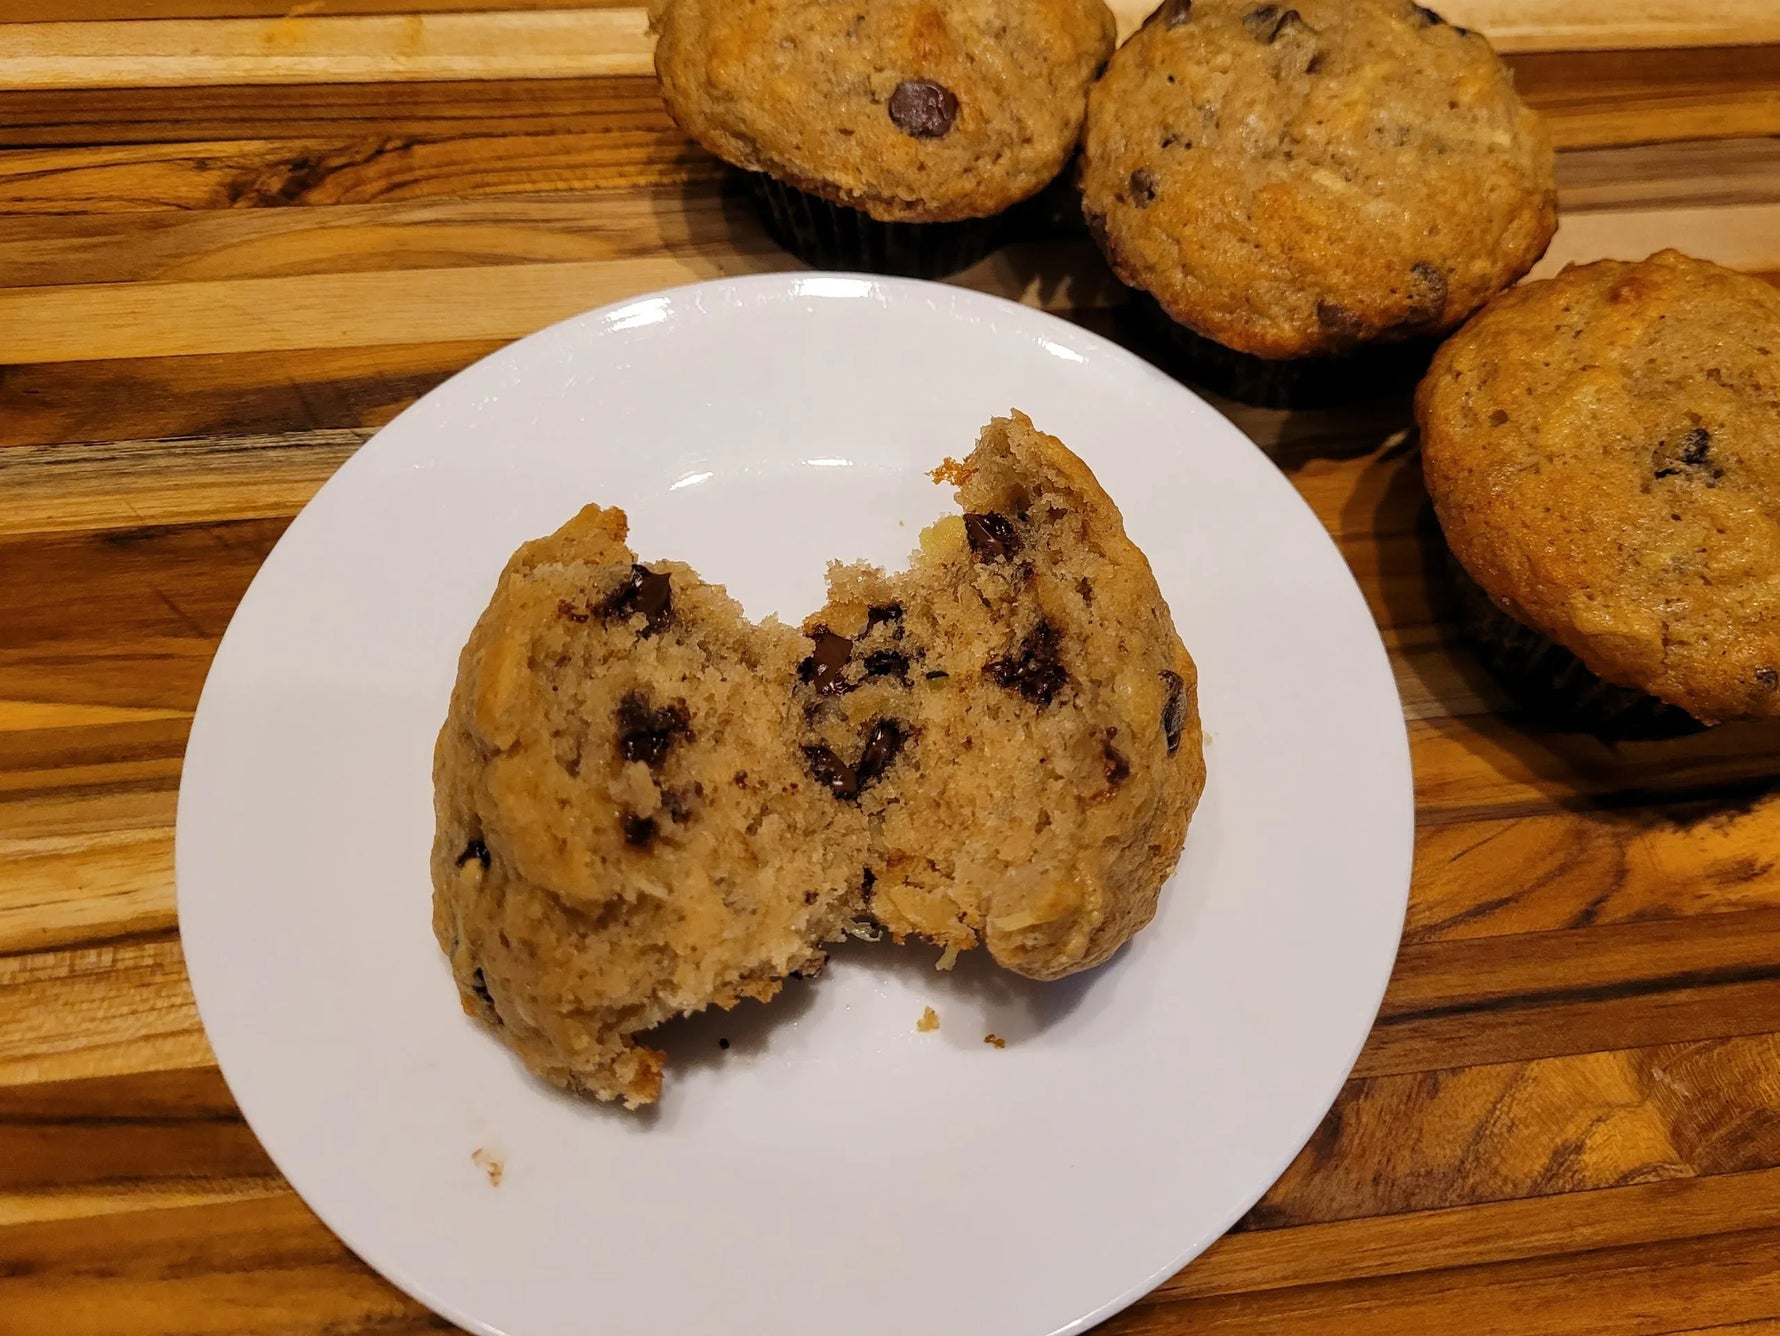
Muffins make the ideal snack, breakfast, or dessert! And with muffins as tasty as these, you’ll want to eat them for all three. Do you have picky eaters in your house who don’t love veggies? This delicious muffin recipe incorporates zucchini, one of the best vegetables to bake with, and your kiddos and teens won’t even know it’s in there!
Ingredients
2 Cups AP flour
1/2 Tsp Baking Soda
1 Tsp Baking Powder (slightly heaped)
1 Tsp Cinnamon
3/4 Tsp Kosher Salt
1/2 Cup Granulated Sugar
1/2 Cup Brown Sugar (Packed)
2 large Eggs
1 Cup Butter (Melted)
1 Tbsp Vanilla Extract (Mexican goes great with Chocolate)
2 large Bananas mashed (overripe)
1.5 Cup Grated Zucchini
1 Cup Semi-sweet Chocolate Chips
INSTRUCTIONS
Step 1
Add muffin liners to a non-stick muffin pan and set aside. These are large muffins so the bigger the liner the better) Preheat your oven to 350F
Step 2
In one bowl, sift the flour, baking soda, baking powder, cinnamon, and salt. Then, toss the chocolate chips in with this mixture so they get coated in flour (this helps them not sink to the bottom of the muffin).
Step 3
In a large mixing bowl, mash the bananas and then add the sugar, melted butter, eggs, and vanilla and mix until well blended.
Step 4
Add the dry mixture to the wet until just combined. Now, fold in the zucchini
Step 5
Divide equally amongst the 12 muffin liners and bake for approximately 25 minutes. Test with a toothpick when they are out of the oven; There should be some crumbs but no wet batter.
News
by Shane Walper on Jan 21 2025
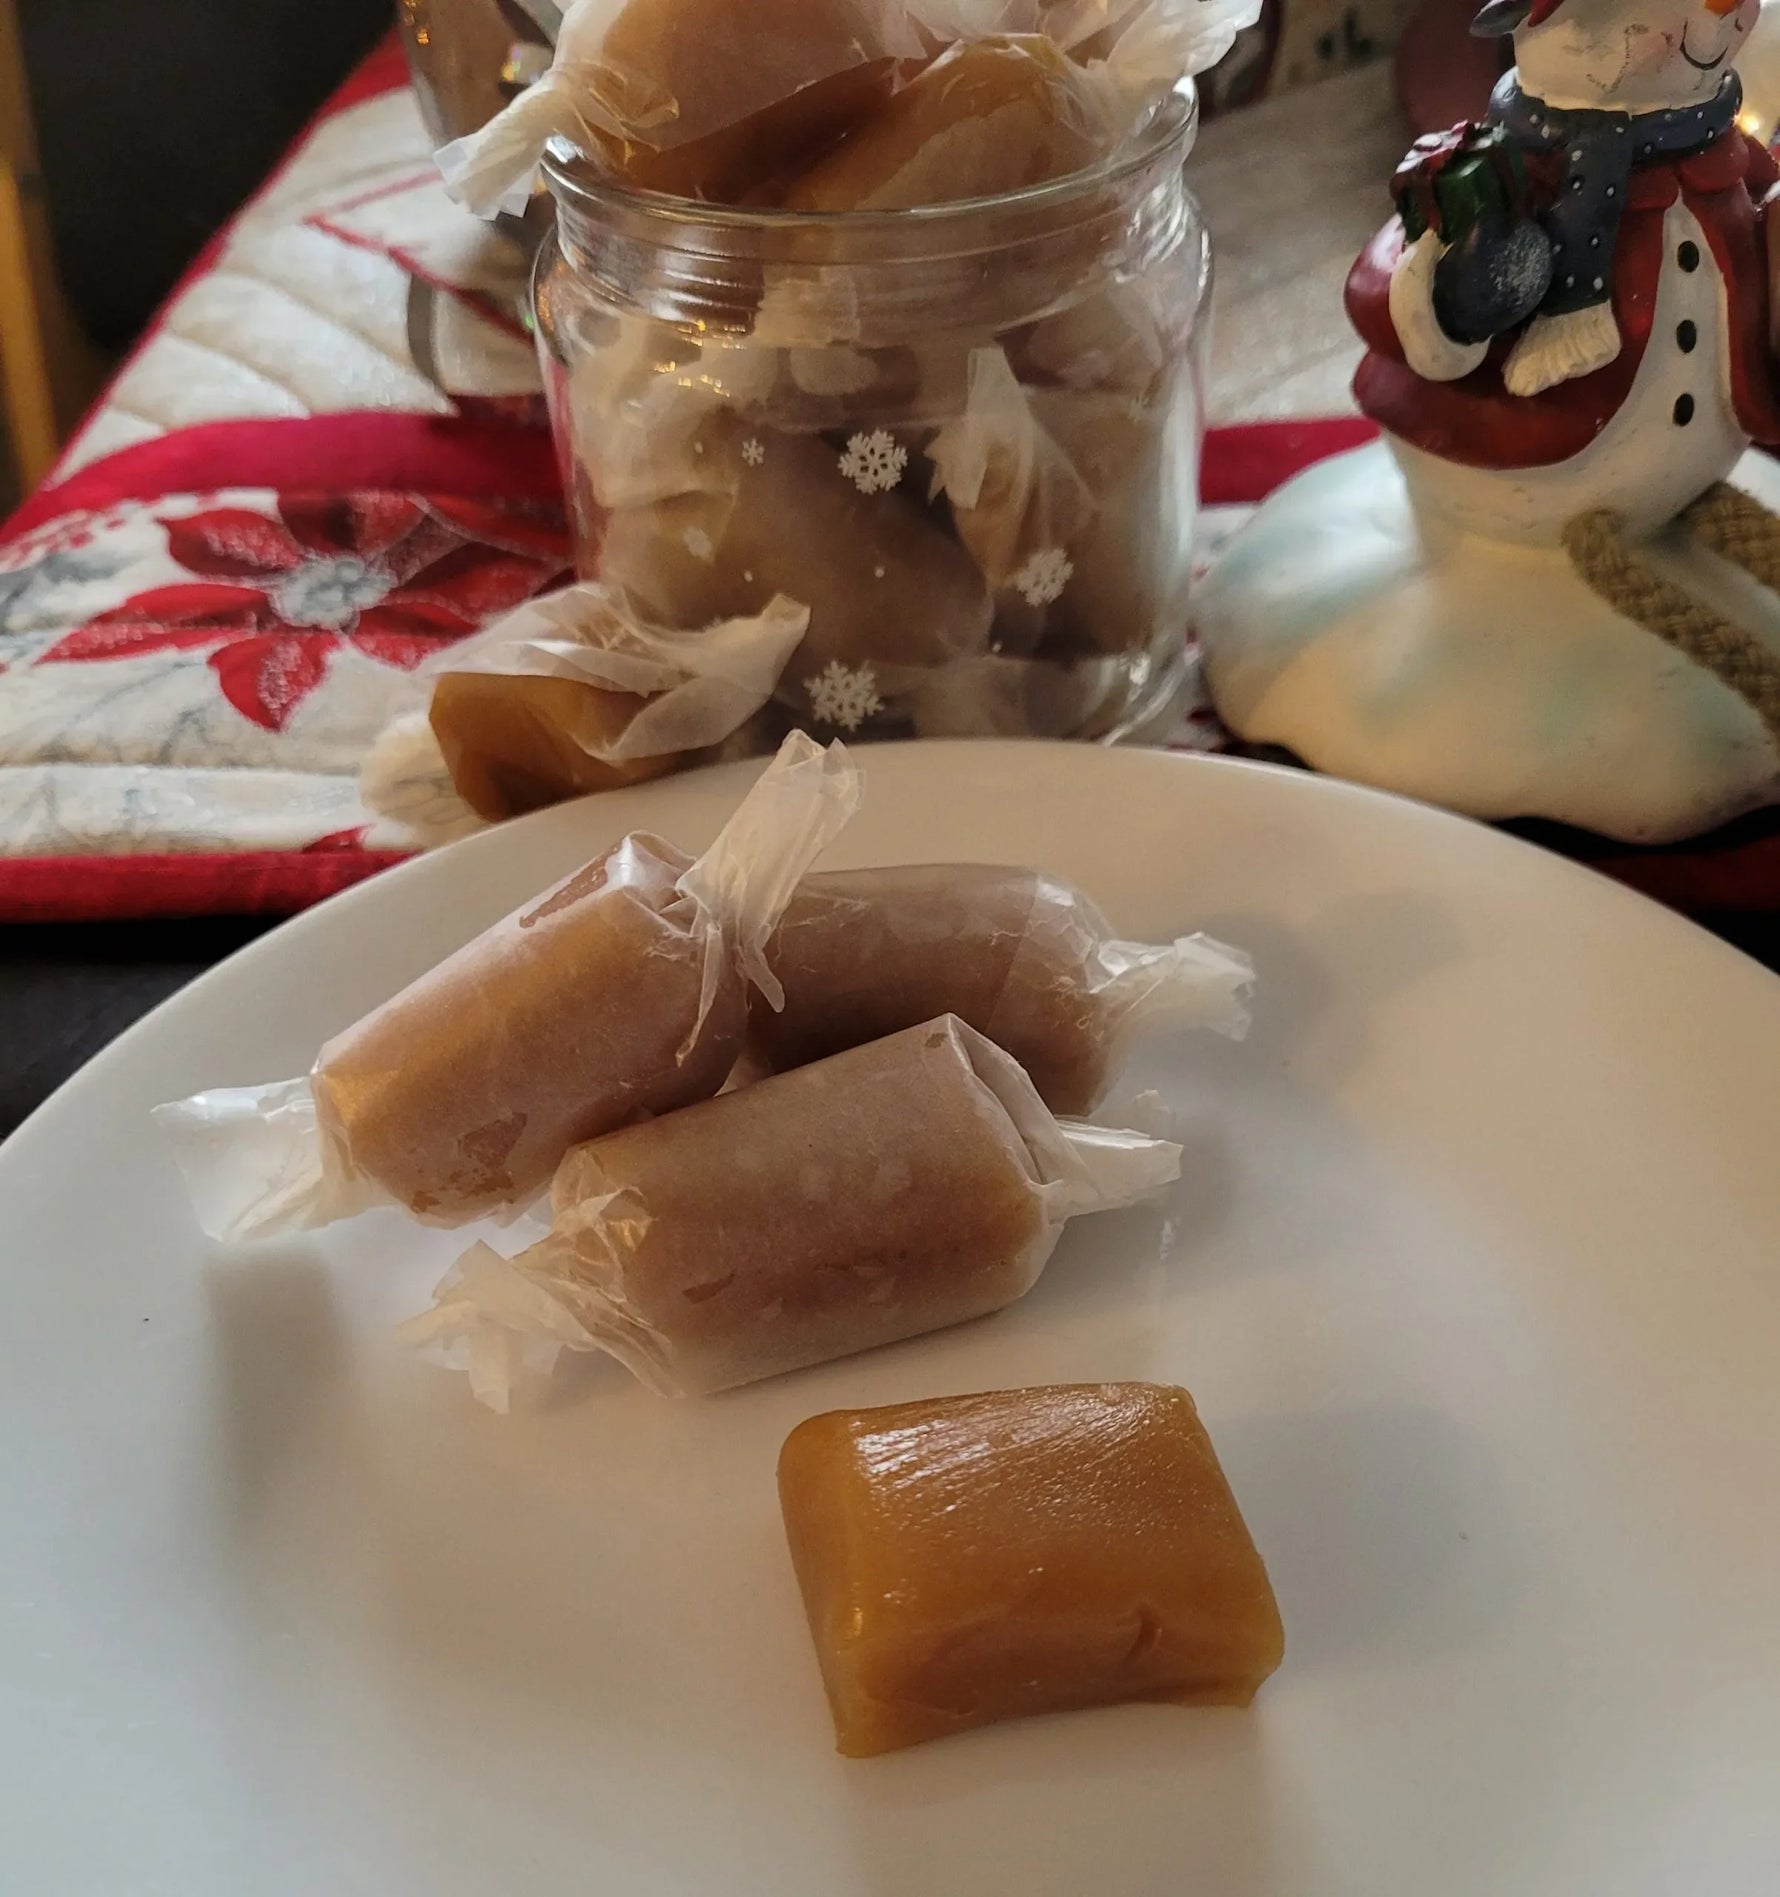
Caramels are a tried-and-true favorite. If you’ve never made your own caramels, you are missing out! These incredible little treats area favourite of ours here at Vanilla Planet
Ingredients
2 Cups Granulated Sugar
1 Cup Packed Brown Sugar
1 Cup Dark Corn Syrup
1 Cup Heavy Whipping Cream (35%)
1 Cup Milk (I use 2%)
1 Cup Butter
1 Tsp Kosher Salt
1 Bean Madagascar Vanilla Caviar
2 Tsp Madagascar Vanilla Extract
INSTRUCTIONS
Step 1
Line a 9×9 pan with Non-stick aluminum foil or parchment. Lightly spray with oil so caramels are easy to remove. I love the non-stick aluminum foil for candy.
Step 2
In a heavy bottomed s/s pot, add first 7 ingredients and over medium heat bring to a boil, only stirring once in a while. Insert a candy thermometer into the mixture and bring to 242F (soft caramels) or 248F for firmer caramels.
Step 3
Quickly stir in the Vanilla caviar and extract, and pour into prepared pan before it starts to firm up, this happens fairly quickly don’t let it sit.
Step 4
After 20 min, lightly score with a sharp knife where you will want to cut them once they are cool. Once cool lightly oil a chefs knife and cut into small pieces. I wrap each piece in waxed paper. Enjoy! These are great additioins to gift boxes and trays of goodies.
News
by Shane Walper on Jan 21 2025
These are a traditional Newfoundland style Orange tea bun with a Vanilla twist.
When the citrus notes of Mandarin orange mingle with fragrant, rich vanilla, magic is made! This flavour combo is perfect in these fluffy tea buns. Hosting a brunch? Need a treat or snack that isn’t overly sweet? Our tea buns will be your new go-to! Easy to whip up and as delicious as can be, these are versatile and can be eaten with virtually any meal – or as a snack all on their own. We highly recommend topping these with our homemade honey butter, which takes them from great to incredible!!You and your guests won’t be able to resist these pillowy tea buns.
Ingredients
4 Cups All Purpose Flour
1.5 TBSP Baking Powder
3/4 Cup Sugar
3/4 Cup Fine Unsweetened Coconut
1-1/2 Tsp Salt
1 Cup Butter
1 Can Mandarin Orange Segments in Light Juice
1/2 Cup Milk
2 Large Eggs
2 Beans Caviar from Papua New Guinea Vanilla Beans
1 Cup Dried Fruit (Optional)
INSTRUCTIONS
Step 1
Preheat oven to 350F.
Step 2
Combine flour, sugar, coconut, baking powder, and salt in a large bowl and blend together with a whisk.
Step 3
In a separate bowl add oranges and syrup (breaking them into small pieces with your hands), milk, eggs, and vanilla, mix well.
Step 4
Add wet into dry ingredients and add dried fruit if using.
Step 5
Drop by heaping spoon full on parchment lined sheet pans.
Step 6
Bake 15-19 min until barely golden and a toothpick comes out clean.
Step 7
Serve with Vanilla-Honey Butter.
News
by Shane Walper on Jan 21 2025
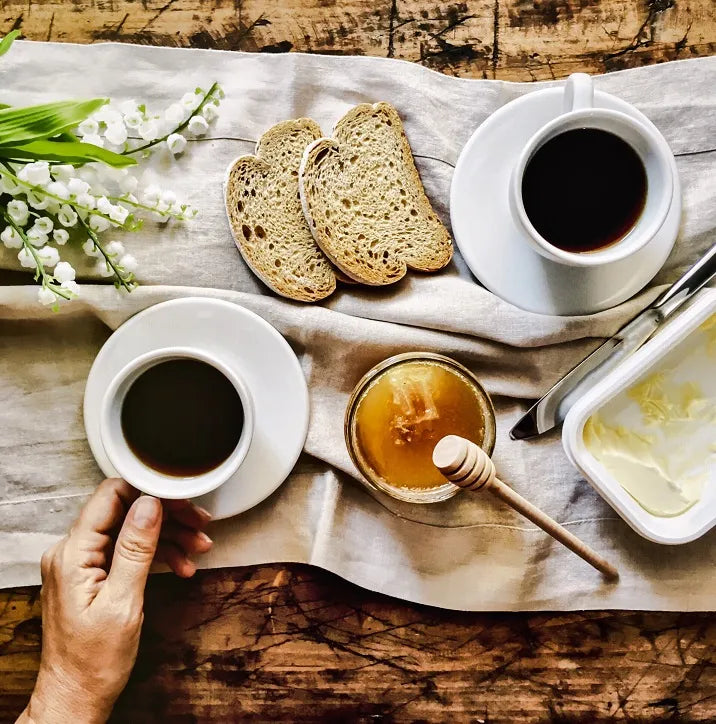
Just picture it: warm buns fresh out of the oven, smothered in homemade honey butter. Is your mouthwatering yet?!
Honey butter is the perfect finishing touch on a wide variety of delicious recipes. It can be used on buns, pancakes, cornbread, and so many other yummy foods. If you’ve ever had honey butter in a restaurant or café, and thought you’d never be able to recreate it – think again! This honey butter recipe is extremely simple and straightforward. You’ll be making it constantly once you taste how amazing it is!
While some honey butter recipes don’t include vanilla, at Vanilla Planet, of course we had to incorporate it! Authentic vanilla gives honey butter an extra depth of flavour and subtle sweetness. You will want to eat it all on its own!
Equipment
Food Processor, or Mixer
Ingredients
1-1/2 Cups Softened Butter
1-1/2 Cups Liquid Honey
1/2 Cup Sugar
1 Cup Heavy Whipping Cream
2 Beans Caviar from Madagascar Vanilla Beans
INSTRUCTIONS
Step 1
In a medium sauce pan combine, cream, sugar and honey and bring to a boil.
Step 2
Boil for one minute, then cool for 10 min.
Step 3
While this is cooling add butter to food processor or mixer with whipping attachment, then gradually add warm liquid while processing and blend very well.
Step 4
Add Vanilla paste or caviar and blend again till smooth and fluffy.
Step 5
Store in the fridge…I keep a small container on the counter and remaining in the fridge.
News
New York Style Vanilla Bean Cheesecake
by Shane Walper on Jan 21 2025
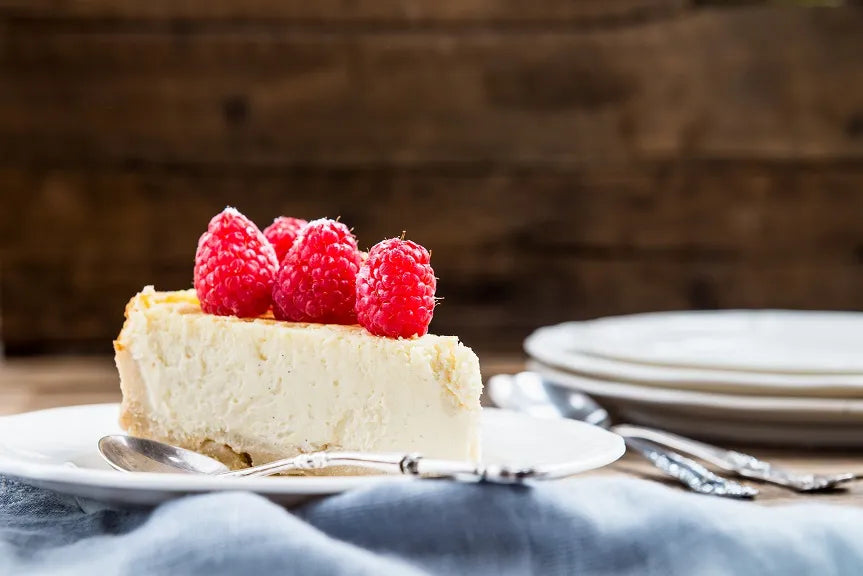
Whether you need a cake for a special event, for an after-dinner treat, or just to add some tasty goodness into your everyday routine, this cheesecake is a sure-fire winner!
*Recipe Note: Make sure all ingredients are at room temperature.
A good cheesecake takes time and attention, and this one is no exception! Rich, creamy, decadent…this cake is made for pure enjoyment. Roxane spent time developing this recipe into its current form, and she wants everyone to be able to create it in their own kitchen.
Cake is more than just a dessert. It means time spent with family and friends, special gatherings, and happy times. We want all of our customers who make and enjoy this cheesecake to know that the recipe was created with love and was intended to bring some much-needed joy into your lives.
Equipment
10″ Spring Form Pan
Ingredients
Make sure all of your ingredients are at room temperature.
BASE
1-1/2 Cups Graham Cracker Crumbs
1/4 Cup Suga
1/4 Cup Melted Butter
FILLING
32 oz Cream Cheese
5 Large Eggs
2 Cups Sour Cream (14%)
1/2 Cup Butter
1-1/2 Cups Sugar
2 Tbsp Corn Starch
3 Beans Caviar from Uganda Vanilla Beans
1 Tbsp Fresh Lemon Juice
TOPPING
3/4 Cup Sour Cream
1/3 Cup Sugar
1 Bean Caviar from Uganda Vanilla Beans
2 Cups Fruit Filling (Your choice of flavour.)
INSTRUCTIONS - Base
Step 1
Heat oven to 350.
Step 2
Mix base ingredients and pack into the base of a 10” Spring form pan.
Step 3
Bake for about 15 min or until it lightly brown on the edges
Step 4
Tightly wrap the base of the Springform pan with tinfoil after it cools and coat sides of pan with butter or oil spray.
Step 5
Store in the fridge…I keep a small container on the counter and remaining in the fridge.
INSTRUCTIONS - Filling
Step 1
Heat oven to 300.
Step 2
In a large mixer bowl bet cheese and butter till light (use paddle attachment).
Step 3
Add eggs one at a time until incorporated.
Step 4
Add Sour cream until smooth.
Step 5
Add Sugar, cornstarch, vanilla and lemon juice and beat 2min.
Step 6
Pour over crust and place inside a large roasting pan with high sides. Place in oven and add boiling water to the roaster being careful not to get any in the cheesecake.
Step 7
Bake 1 hr and 40 min up to 2 hrs r until lightly brown and set but still jiggling.
Step 8
Remove and cool for 15 min and get rid of water bath.
Step 9
Heat oven to 425.
Step 10
Mix sour cream, sugar and vanilla and spread on warm cheesecake, place in oven and bake another 12 min.
Step 11
Remove and let come to room temp before placing in fridge overnight to cool.
Topping
Top with any fruit you like. We recommend our Homemade Evan’s Sour Cherry Filling.
News
by Shane Walper on Jan 21 2025
Need a dessert that will wow your guests? Pavlova is the perfect treat that looks fancy but isn’t too hard to whip together! With a few simple ingredients (and some delicious vanilla), you’ll have a wow-factor dessert ready for your next soiree.
Ingredients
6 Large Egg Whites (Important to be at room temperature)
2 Tsp Lemon Juice or White Vinegar
2 Tsp Ugandan Vanilla Extract
2 Cups Granulated White Sugar
2 Tsp CornStarch
1/2 Tsp Kosher Salt
INSTRUCTIONS
This recipe needs to be started the day before you plan to serve it, so be sure to plan ahead!
Step 1 –Preheat your oven to 300F
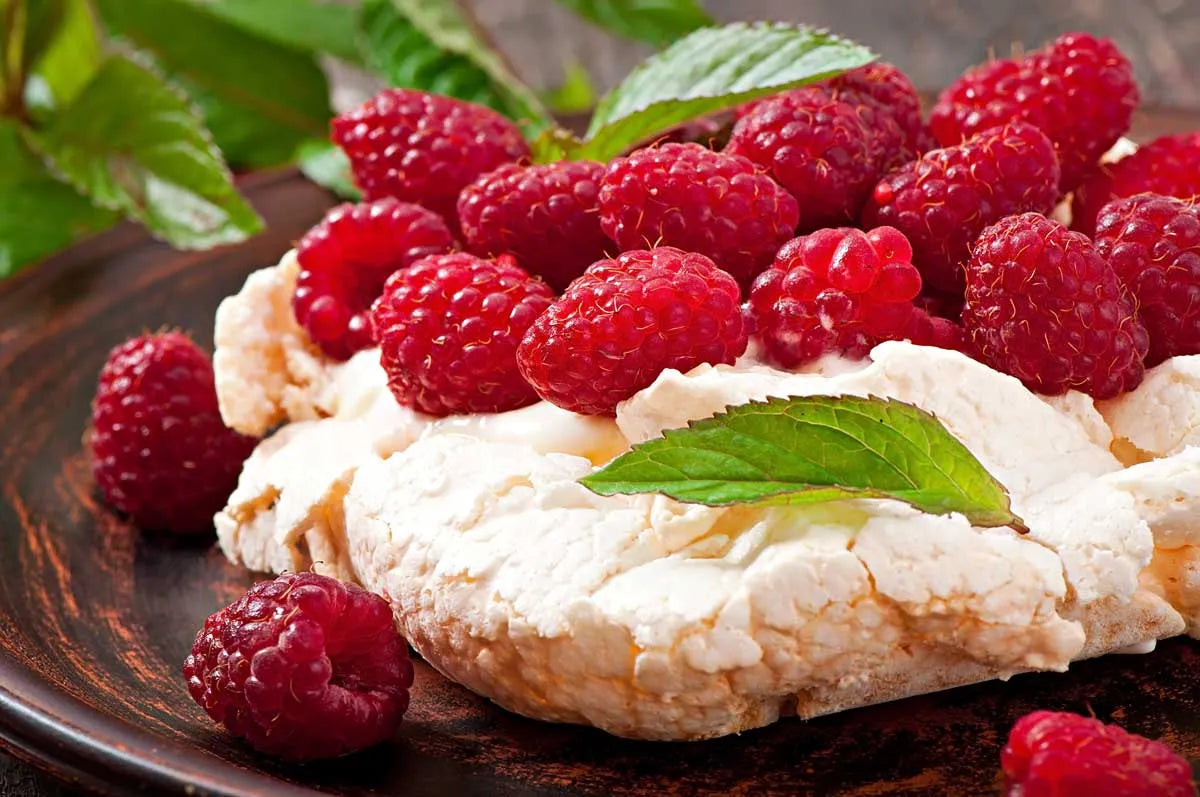
Step 2 – Prepare a sheet pan (full size) with a piece of parchment (draw a large circle on one side with a pencil and flip it over. This way you will be able to follow the tracing of the circle without contaminating your pavlova.) For the one in the picture I did 8 mini ones.
Step 3 – In a mixer with the whisk attachment, slowly start whipping the egg whites with just the salt and slowly increase speed until you get it to the high setting. Continue until satiny peaks form.
Step 4 – Gradually add in the sugar one tablespoon at a time until meringue is stiff and shiny. Slowly fold in cornstarch, vinegar, and vanilla.
Step 5 – Mound onto the parchment (without deflating) into the circle traced earlier. Try to leave a bit of a bowl shape in the middle with a ridged side to hold toppings later on.
Step 6 – Bake for 1 hour and 15 min.IMPORTANT NOTE: Do not open the oven door! Turn off the oven and allow meringue to cool off to room temperature in the oven.
Step 7 – Tip: We suggest filling just before serving with sweetened whipped cream (with the same vanilla used in the Pavlova). This dessert lends well to peaches and Raspberries – but use any fruit you enjoy!. For the one in the picture, we added whipped cream, lemon curd made from the leftover yolks and a few raspberries.
News
by Shane Walper on Jan 21 2025
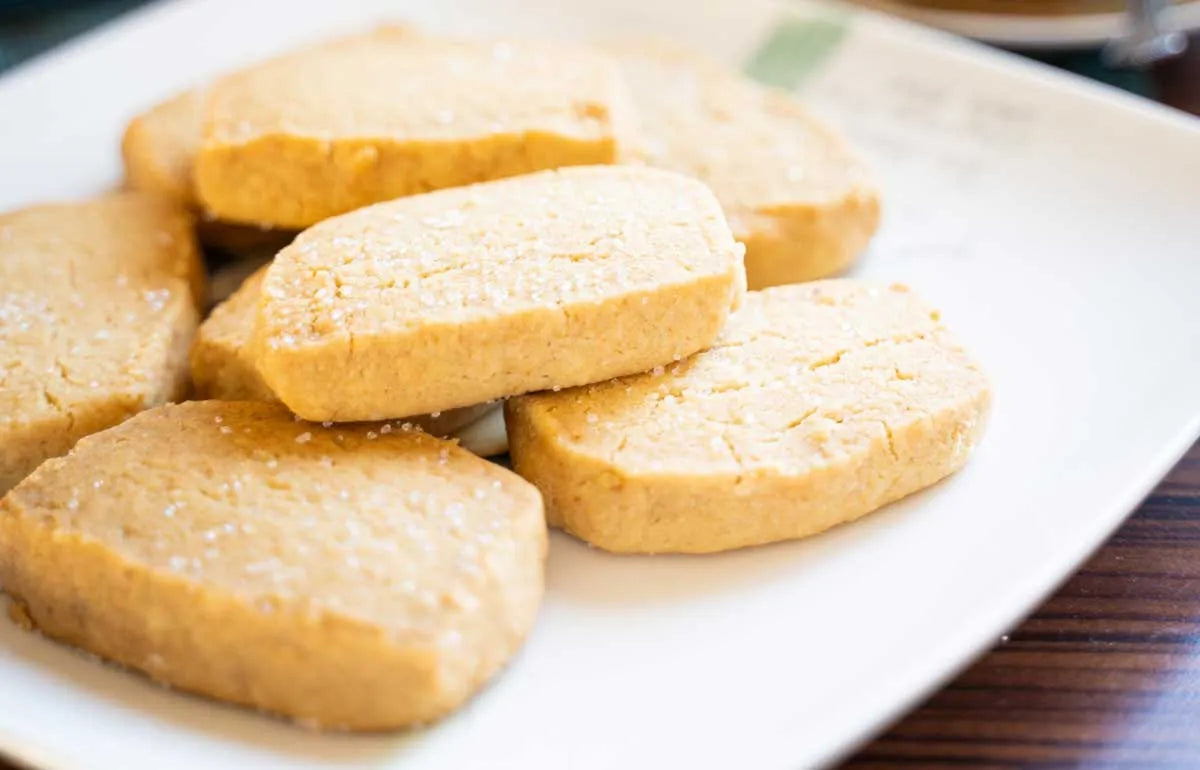
Enjoy these luscious shortbread cookies withfamily and friends – they’re perfect for gatherings, especially around the holiday season
Ingredients
1 Cup Canada’s Cornstarch (Fleishmann’s)
1 Cup Icing Sugar
2 Cups AP Flour
1-1/2 Cups Butter (Softened)
1 Bean Caviar from one PNG Vanilla Bean
INSTRUCTIONS
Do not use Vanilla extract, as it adds moisture and changes the texture of the shortbread.
Step 1 – Preheat your oven to 300F and line a full size sheetpan with parchment paper. Make sure your ingredients are all at room temperature or your doughwill not come together if the butter is hard.
Step 2 – Add all ingredients into your mixer, and using the paddle attachment, mix until everything comes together and the dough is cohesive
Step 3 – You can roll these out and cut with cookie cutters, or you can roll into small balls and flatten. We prefer ours about ¼ of an inch thick. They do not need a lot of room to spread, so you can place them about 1” (2.5 cm) apart.
Step 4 – Bake for 15-20 minutes or until edges just start to turn brown. (You should get approx. 50 cookies from this amount of dough) Enjoy!